
TL;DR
Acoustic dampening in a closet isn’t just about foam; it’s about placement, sealing gaps, and proper ventilation. Moving your rig elsewhere is often the simplest, most effective fix. For a closet setup, strategic treatment and airflow keep noise low and heat manageable.
Ever wondered why your closet isn’t just a good spot for recording but could actually be a quiet, controlled environment? It’s all about how you treat the space—not just slapping foam on the walls. You’ll learn how to dampen reflections, block sound leaks, and keep your gear cool—without turning your closet into a sauna.
This guide dives into real-world strategies for turning a tiny, noisy closet into a professional-sounding booth. Whether you want to record vocals, host a podcast, or just reduce noise, understanding placement and ventilation makes all the difference.
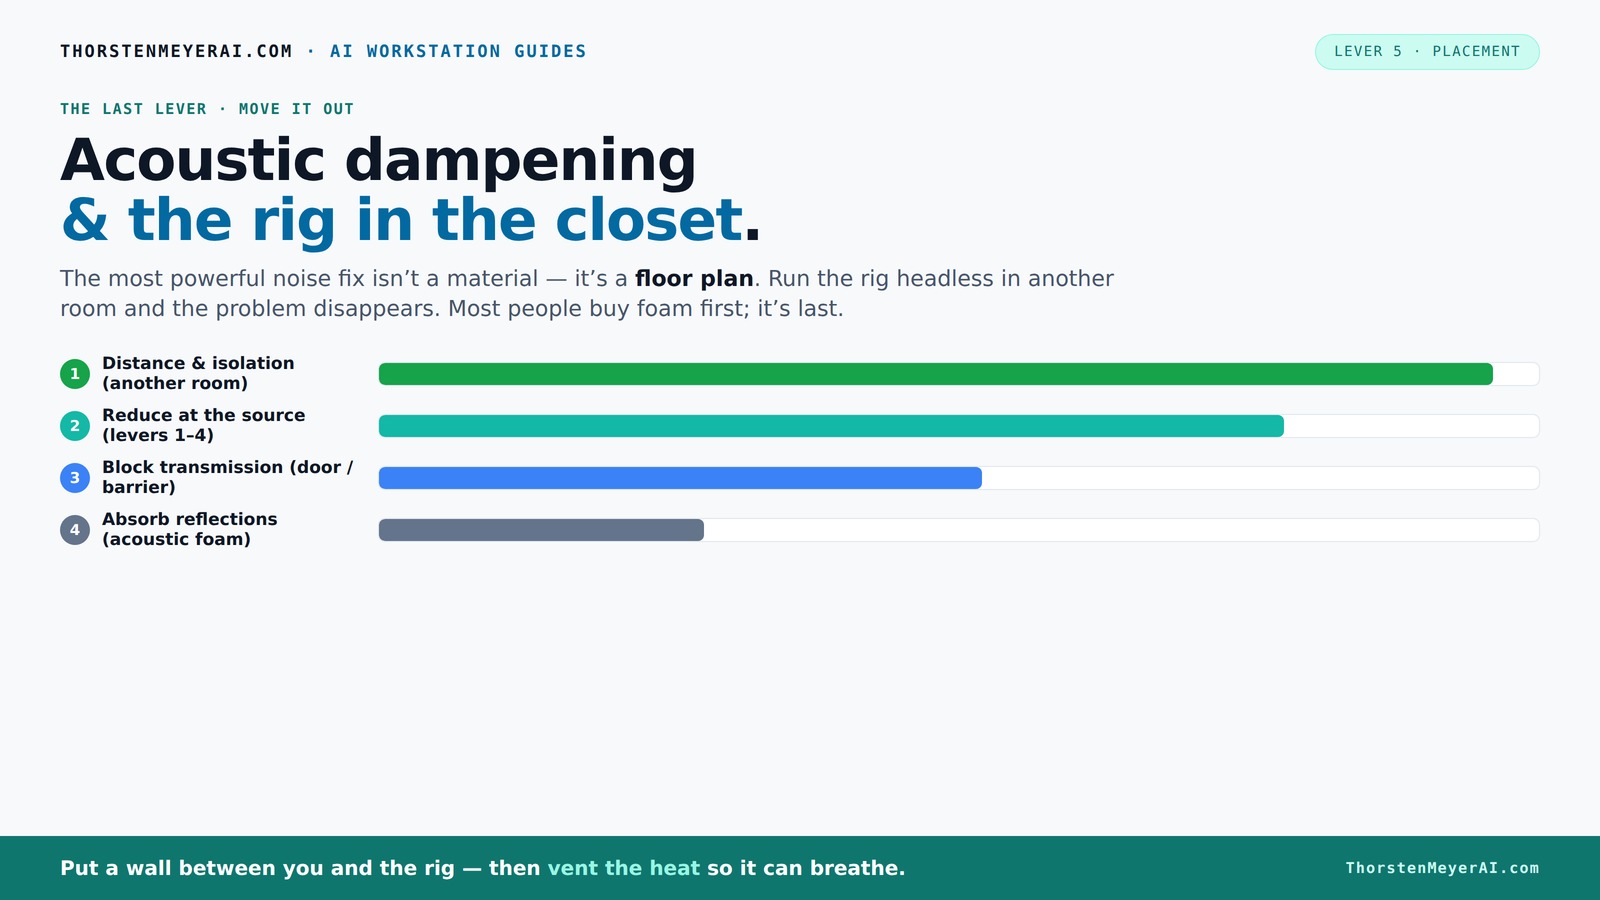
Acoustic dampening
& the rig in the closet.
The most powerful noise fix isn’t a material — it’s a floor plan. A rig you can’t hear because it’s in another room beats any amount of foam. Tap the approaches in Part 1 to see what actually works.
(another room)
(levers 1–4)
(door / barrier)
(acoustic foam)
Contain the noise, not the heat
Key Takeaways
- Strategic placement of acoustic treatment points reduces reflections more effectively than covering every wall.
- Sealing gaps and adding mass are more important for soundproofing than foam alone.
- Proper ventilation in a closet rig prevents heat buildup and fan noise, keeping your setup safe and silent.
- Use reflection filters and mic positioning to avoid echo and capture clean sound.
- Moving your rig to another room is often the simplest way to eliminate noise entirely.

Focusound 52 Pack Acoustic Foam Panels 1" x 12" x 12" Sound Proof Foam Panles Soundproofing Noise Cancelling Wedge Panels for Home Office Recoding Studio with 300PCS Double-Side Adhesive
Soundproofing - Acoustic foam panels triangular grooves structure for better noise absorption, helps to reduce and absorb unwanted...
As an affiliate, we earn on qualifying purchases.
As an affiliate, we earn on qualifying purchases.
Why Acoustic Dampening Isn’t Just About Foam
Acoustic dampening in a closet is about controlling reflections and echoes, not full soundproofing. Thick panels, blankets, and rugs soak up sound bouncing around. But remember: foam absorbs within a room—blocking sound transmission requires sealing gaps and adding mass.
For example, hanging a thick blanket on the door or placing rugs on the floor cuts down on flutter echo and deadens boxy sound. Thicker panels—say 4 inches—absorb lower frequencies better, especially in a small space with parallel walls. Foam alone won’t stop noise from leaking out or being heard outside.
Understanding this distinction matters because many people assume foam is enough to make their space soundproof. In reality, foam improves the quality of recordings by reducing internal reflections, but it doesn't prevent sound from escaping. The tradeoff is that relying solely on foam can lead to a false sense of security; you might think your space is soundproofed when it’s really just echo-reduced. To truly block sound transmission, it's essential to combine absorption with sealing gaps and adding mass—these are the real barriers to noise leakage.

Portable Recording Booth for Home Studio, Soundproof Vocal Booth with Travel Bag for Voiceovers, Podcasts, Streaming and Music Recording
【Superior Sound Isolation for Clean Takes】: Durable oxford fabric with multi-layer acoustic pads helps absorb up to 90%...
As an affiliate, we earn on qualifying purchases.
As an affiliate, we earn on qualifying purchases.
How Placement of Absorbers and Microphone Matters
Placement in your closet studio is the secret sauce. Start by identifying the main reflection points—usually the wall behind you, ceiling above your head, and the wall opposite your mic. Place panels or blankets there first. Learn more about acoustic treatment placement.
Imagine recording vocals in a closet: positioning the mic near the doorway and treating the wall behind it prevents harsh echoes. Use a reflection filter behind the mic, and hang blankets on the door and side walls. Rugs on the floor help tame low-end buildup caused by small, parallel surfaces.
Pro tip: Treat the first reflection points, not every inch of the closet. This targeted approach saves money and space, and it works better. Proper placement matters because sound waves bounce unpredictably in small, enclosed spaces. If you treat the wrong surfaces or place your mic poorly, you risk capturing unwanted echoes or room noise. The implication is that strategic placement enhances clarity and reduces the need for excessive treatment, which can be costly and space-consuming. The tradeoff is that overly aggressive treatment in small spaces can make the room sound unnatural or dead, so balance is key.

OXRQ Door Draft Stopper, Door Sweep for Bottom of Door, Weather Stripping Door Seal Gap Filler Bottom Blocker Soundproofing Cold Air Insulation Save Energy Install Quickly Easily (Black, 39‘’)
Premium Thickened Flexible Silicone Material - Heat And Cold Resistant: OXRQ Door Draft Stopper is made from high-quality...
As an affiliate, we earn on qualifying purchases.
As an affiliate, we earn on qualifying purchases.
Turning Your Closet Into a Quiet, Cool Rig — The Ventilation Trick
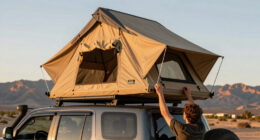
Placing a high-power rig in a closet sounds ideal for noise reduction—until it overheats. The secret to a successful 'rig in the closet' setup is airflow. Without it, heat builds up fast, throttling your machine and making fans roar. Explore workspace design tips for better airflow management.
Imagine a GPU dumping 600W in a sealed closet—temperatures skyrocket, fans spin faster, and noise increases. To prevent this, add passive vents or, better yet, a quiet exhaust fan. Using a thermally controlled ducted system keeps things cool without noisy fans.
Proper ventilation isn't just about cooling; it’s crucial for maintaining the longevity and performance of your equipment. Without adequate airflow, heat can cause components to throttle or even fail prematurely. The tradeoff is that installing vents or fans introduces potential noise sources, but choosing quiet, thermally controlled systems minimizes this issue. The implication is that neglecting ventilation can turn your quiet setup into a thermal nightmare, negating the benefits of soundproofing and quiet operation. The takeaway: effective airflow management is as important as acoustic treatment for a successful closet rig.

Tjernlund V2D Underaire Crawlspace Ventilator Fan Moisture Reducing 220 CFM
Power ventilates and reduces moisture in crawl spaces through existing passive vents
As an affiliate, we earn on qualifying purchases.
As an affiliate, we earn on qualifying purchases.
Top 3 Ways to Reduce Sound Leaks in a Closet Studio
- Seal gaps around the door and vents with weatherstripping or acoustic gaskets. Even tiny cracks let sound escape, and sealing these can dramatically improve isolation. See more about reducing sound leaks.
- Use heavy, dense materials—like a door blanket or mass-loaded vinyl—over the door to block leaks. These materials add mass, making it harder for sound to pass through.
- Place rugs, blankets, or foam on hard surfaces to absorb sound waves traveling through the space. This reduces the amount of sound that can bounce around and escape.
For example, sealing the door with weatherstripping can reduce noise leaks by over 50%, according to soundproofing studies. Combining these strategies creates a much quieter environment, even in a small, enclosed closet. The implication is that sound leaks are often overlooked but are crucial for true isolation. Addressing even small cracks can make the difference between a noisy closet and a professional-quality sound space. The tradeoff involves balancing ease of installation with effectiveness; sealing is simple but highly impactful, while adding mass or absorption provides additional benefits.
Should You Foam Your Closet? Or Use Better Tricks?
Foam isn’t a magic bullet for soundproofing. It absorbs reflections but does nothing to block sound from leaking outside. Instead, focus on sealing gaps, adding mass, and using decoupling mounts to isolate your gear. Visit Style Guru for interior design tips.
In small spaces, heavy blankets or mass-loaded vinyl over walls and doors outperforms foam for blocking sound leaks. For example, sealing a closet door with a dense blanket reduced noise leakage by up to 70%, making it a simple DIY win.
Use foam where it helps—like on reflection points— but don’t rely on it to keep sound inside or outside. The key is understanding that foam is primarily for internal acoustic treatment, not soundproofing. The tradeoff is that overusing foam can deaden the room excessively, making it sound unnatural. Better tricks include sealing gaps, adding mass, and decoupling gear, which provide a more reliable barrier against noise leaks and improve overall sound isolation.
Best Mic Placement to Avoid Echo and Capture Clear Sound
The mic placement is crucial for capturing clear sound and avoiding echo. Proper positioning can make a significant difference in your recordings.cement in a small closet can make or break your sound. Place the mic about 6-12 inches from your mouth, slightly off the wall to avoid capturing reflections. Use a reflection filter behind the mic to block unwanted echoes.
Imagine recording vocals: positioning the mic in the center of the space, away from parallel walls, captures cleaner sound. Adjusting the mic height and angle also helps minimize room noise.
Remember, the goal is to reduce reflections at the source, not just treat the walls afterward. Proper placement minimizes the amount of room sound that reaches the microphone, reducing the need for extensive treatment later. The tradeoff is that poor placement can result in recordings with echo and muddiness, requiring more post-processing. The implication is that thoughtful mic positioning is a simple but effective way to improve sound clarity without extensive treatment.
Quick Checklist for a Quiet, Functional Closet Rig
- Seal all gaps around the door and vents.
- Place thick blankets or acoustic panels at reflection points.
- Use a reflection filter behind the mic.
- Ensure proper ventilation for heat dissipation.
- Position your mic carefully—avoid parallel walls behind it.
Imagine a mini-sound studio in your closet, with the right gear, placement, and airflow. It’s a tiny, powerful setup that produces professional results.
Frequently Asked Questions
Is acoustic foam enough to soundproof a closet?
No. Acoustic foam mainly reduces reflections inside the space. To block sound from leaking out, you need to seal gaps, add mass, and possibly use heavier barriers. Foam alone won’t keep your neighbors from hearing your rig.Where should I place panels in a closet vocal booth?
Start by treating the reflection points—behind you, the ceiling above, and the wall opposite your mic. Place panels strategically where sound bounces and echoes most to get the best results.How thick should acoustic panels be for a closet?
For small spaces, 2-inch panels often suffice for mid and high frequencies. Larger or bass-trap panels—4 inches or more—help absorb low frequencies and reduce muddiness, especially in tight corners.Do I need bass traps in a tiny closet?
Yes, especially if you notice a boomy or muddy sound. Placing bass traps in corners helps control low-end buildup caused by standing waves in small, parallel-walled spaces.How do I stop sound from leaking through the door and cracks?
Seal gaps with weatherstripping or acoustic gaskets, and consider adding a heavy blanket or mass-loaded vinyl over the door. These simple steps dramatically cut down on sound leaks.Conclusion
Turning a closet into a recording haven isn’t magic — it’s smart planning. Focus on sealing gaps, strategic placement of absorption, and airflow. Your closet can become a surprisingly quiet, professional-quality space that lets your voice or gear shine without the noise.
Remember: sometimes, distance and good airflow beat foam and barriers. Think bigger than your closet, and your sound will thank you.